Prerequisites
- You must have created and activated your account.
- You must have a current subscription with the correct subscription requirements (Small Team and above).
- You need access to a Zone layer (previously known as a Radial layer).
- You need editing permissions.
Required time: Up to 10 minutes
In this article, we will focus on the drive distance zone creation. Follow this to look at how to create a drive time zone. Please note that the distance metric (km or mi) shown will be based on the distance units selected in your system settings.
A drive zone can be created by either creating the area in the desired layer or directly from a location pin. This article will focus on creating it in the desired layer, but if you'd like to create it from a pin:
- Select the location so the information window on the right appears
- Select the Actions button of the information window
- Select Generate time/distance zones
This will bring you to the zone editor layer discussed later in the article. Please follow the steps from here.
How to create a drive distance zone
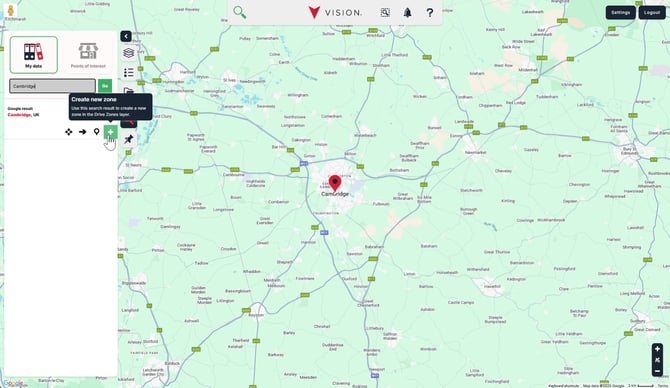
To begin with, turn on the Zone layer and click the Create a new distance/time zone button.

In the search bar, enter your location. You can create zone areas from any location returned within the search results. Simply click the green Create new zone button under the relevant search result to launch the new zone editor.
 Zone Editor
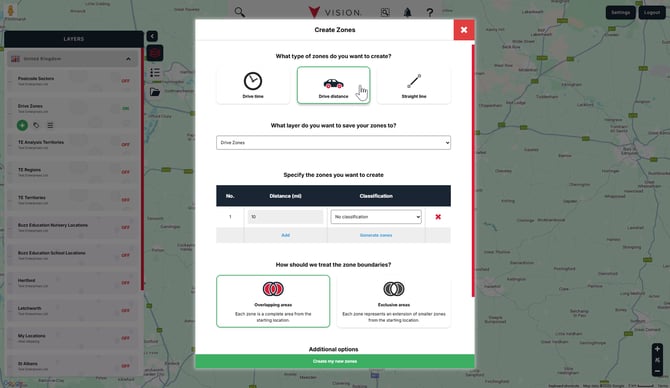
Our zone editor provides options for the type of zone you would like to create.
- Drive Time - An area created based on the time taken to drive from your location.
- Drive Distance - An area created based on the distance driven from your location.
- Straight Line - An area based on a straight line distance, also known as a radius area.
What type of zones do you want to create?
Select the Drive distance option. The choice will be highlighted with a green border.
What layer do you want to save your zones to?
This will be pre-selected with the layer you've chosen to create the area in. If you're creating your zone via a location, you'll need to select the desired layer to hold the zones.
Specify the zones you want to create
In this option, you have a few different choices.
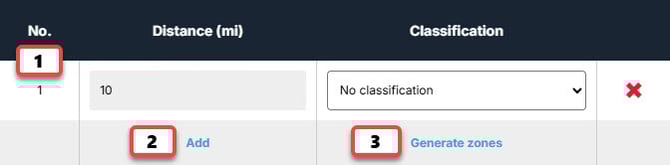
- If you'd like to create a single drive distance zone, amend the Time (mins) cell to your desired drive time.
- You can add zones separately by selecting the Add button. This will provide another option for you to create an additional zone.
- You can generate up to 5 zones if they have the same time interval by selecting the Generate zones button.

- Start at - This provides the drive distance of the first zone.
- Zone interval - The distance between each drive distance zone. In the example above, you can see the zone interval is 5mi, so it's generating zones at 5, 10, 15, 20 and 25 miles.
- End at - Enter a value here if you don't want 5 zones or want to finish at a specific distance. For example, if I wanted to finish at 15 miles, I'd enter 15. This would create 3 zones, a 5, 10 and 15 mile zone.
The information bar will confirm the zones to be created based on your choices. Select the Use these bands to continue and return to the zone editor.
You can also provide classifications against each of the zones by selecting the No classification drop-down menu and selecting the desired classification. If you need to create a classification for your zone layer, please follow this article on how to Create a new classification.
How should we treat the zone boundaries?
Choose from either the Overlapping Areas or the Exclusive Areas.
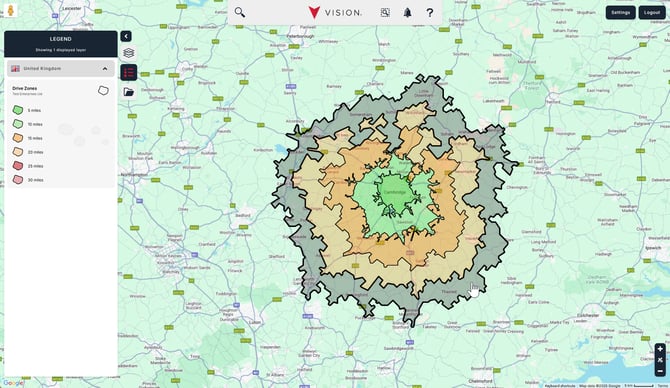
Overlapping Areas - Selecting this will mean that each zone will be created as an independent zone and won't take into consideration other zones created in the zone generation. The image below shows zones with 5 mile intervals. The highlighted zone provides a view of the 25 mile zone, which can be seen to cover all other zones.
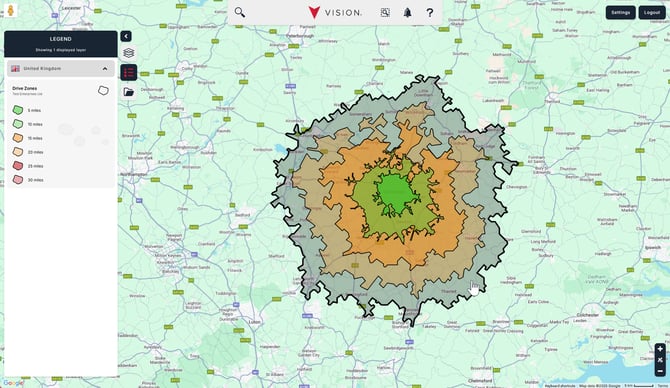
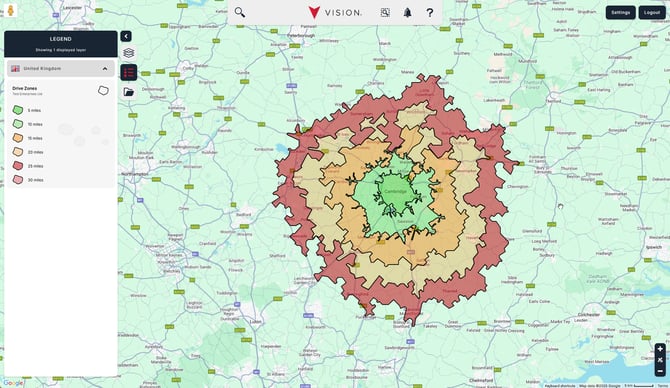
Exclusive Zones - Selecting this provides an exclusivity to the generated zone, meaning there is no overlapping. It takes into consideration the other zones generated at the time and ensures no overlapping between the bands. The image below shows the same distance zones; however, when the 25 mile zone is highlighted, it only provides a view of the 20 to 25 mile zone, and doesn't overlap the previous bands.
Additional options
There is an additional setting that can be changed. If you'd like to change this, select the X next to the option.
- Save Starting Location - This provides you with the option to save the location you're using for the drive time zones. Select the drop-down menu and the desired location layer to save it. Please note, this option won't be available if you're creating the zones via a location.
When you've completed the options available to you, select the green Create my new zones button at the bottom.
Congratulations! You've created your first drive distance zones!