This article will guide you through the process of creating a new layer to hold your areas and locations. You will need to be an Organisation Administrator to do this.
Required time: 5 minutes
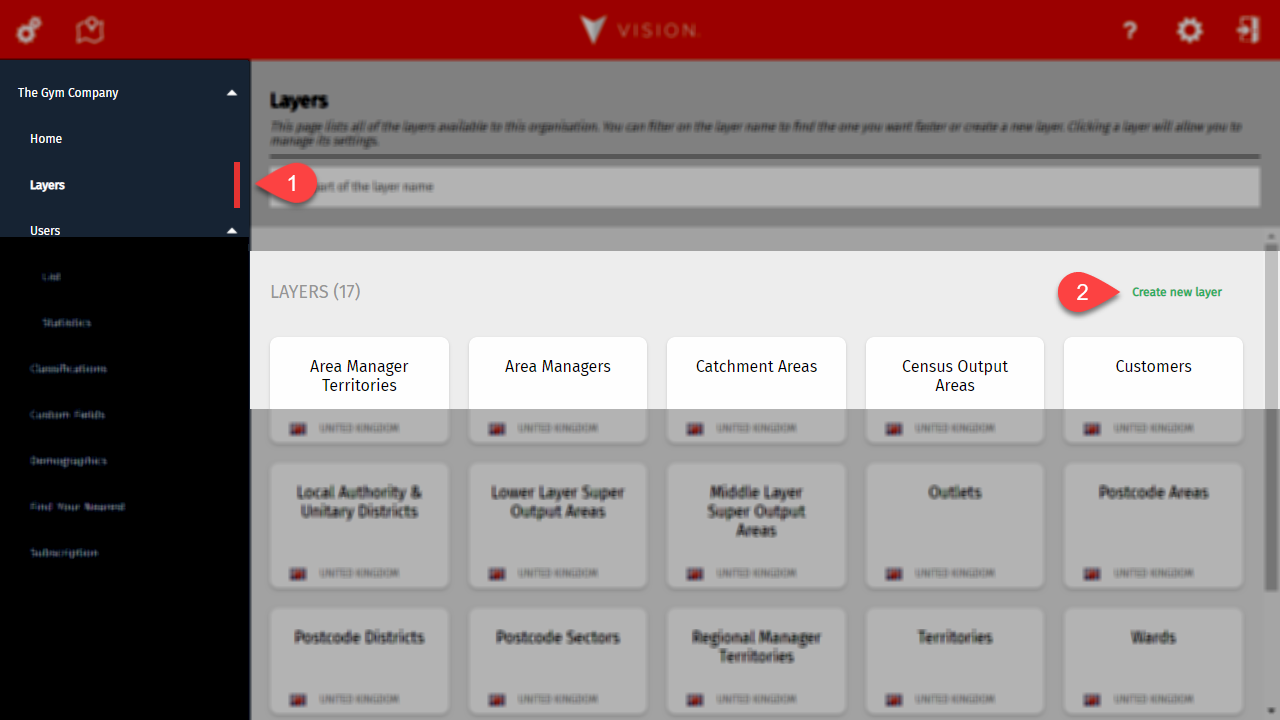
Getting started
Click Settings in the top right of your page.

- Select the Organisations tab on the left-hand side.
- Click the blue Manage button next to your Organisation name.

- Select Layers from the navigation menu, and then
- Click Create new layer to the right-hand side of the Layers section.
Step 1 - The basics
This bit's really easy! Give your layer a name.

We recommend naming your layers based on their intended use. Customers, Stores, and Territories are all good examples.
Click Continue to move on.
Step 2 - Choose the type of layer you want to create
It's now time to specify what you want to use this layer for. Based on your selection, you will then be asked to specify a country or a base layer. Just remember, you can't change this afterwards.
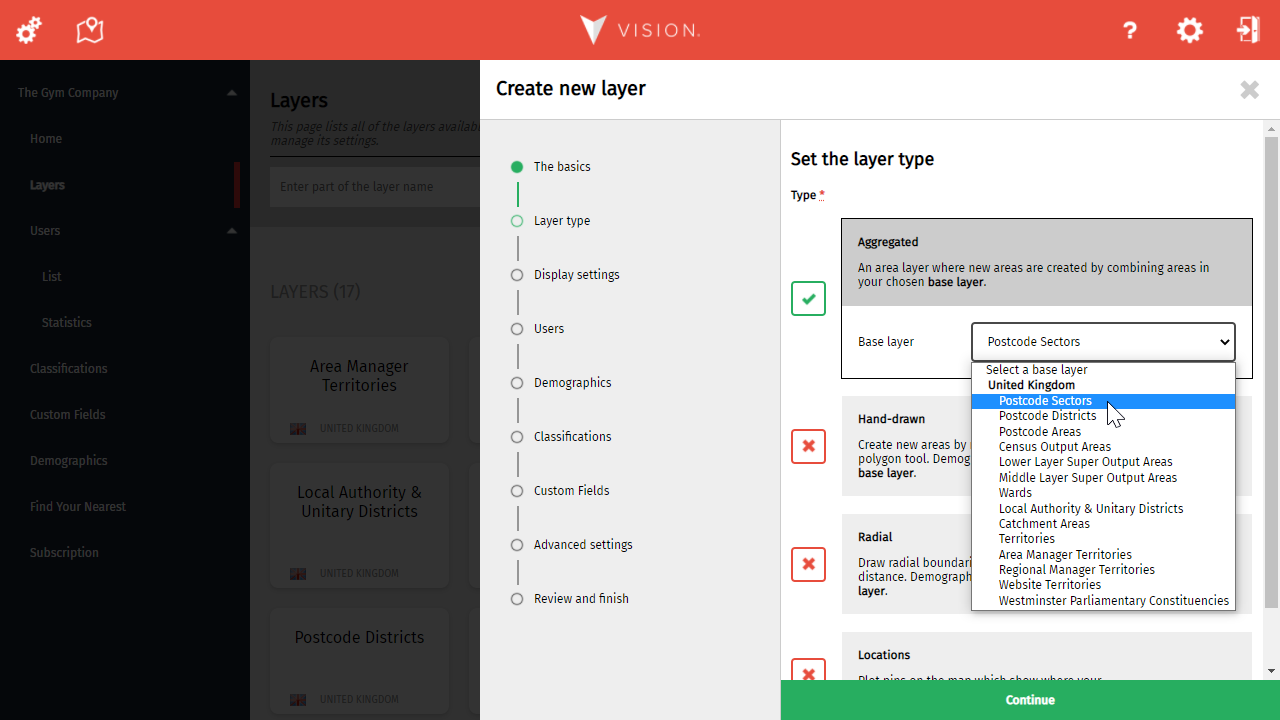
It's essential to select the appropriate layer type. You can't draw an area boundary in aggregated layers, and you can't store locations in a radial layer.
Click Continue to move on.
Step 3 - Choose how the layer will load and its display settings
When creating an area layer, you must select your preferred data load method. You can also choose how the data will look on the map or use the defaults already set for you.
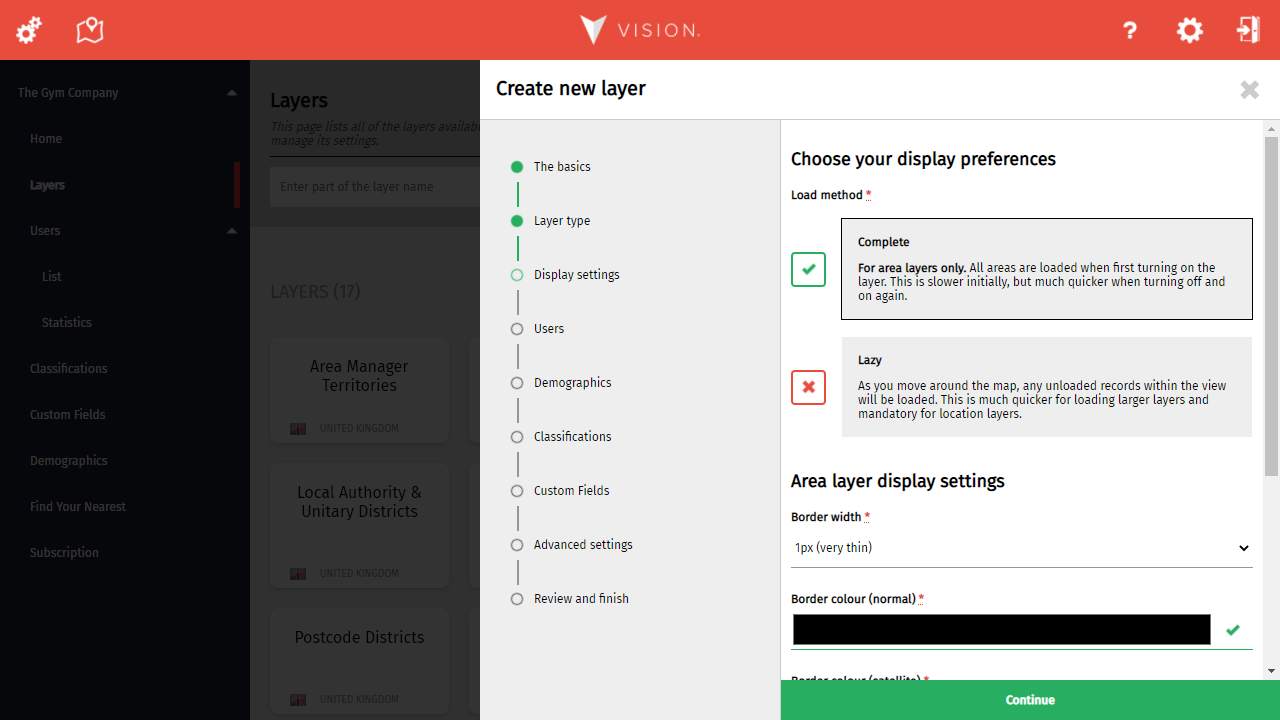
The display settings enable you to fine-tune the appearance of borders and labels for area layer types and map markers for location layer types.
Click Continue to move on.
Step 4 - Choose which users can use the layer
It's now time to choose which users will see this layer in their layer control. If you've got lots of users to choose from, don't worry, as we've added a handy filter at the top of the list. When you select a user, you'll also be able to fine-tune their settings for this layer.
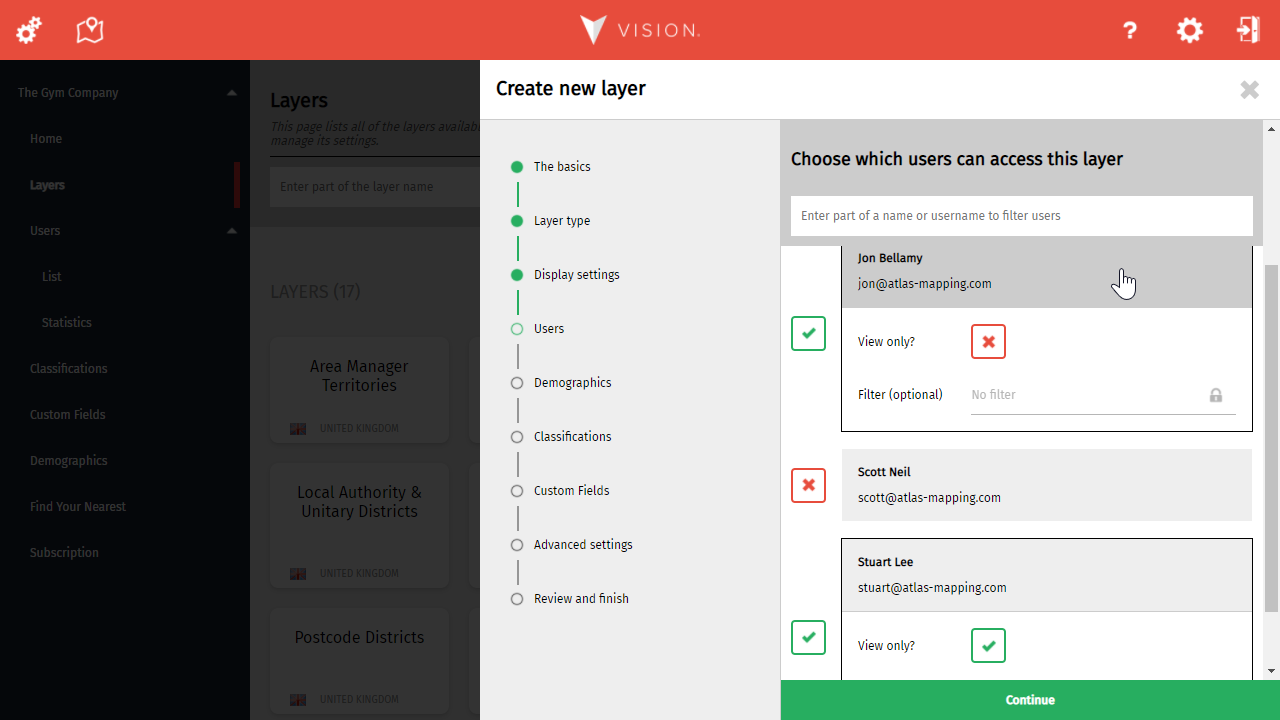
Selecting a user is as easy as clicking on their name. When selected, advanced options are available which override the user's general permissions.
Click Continue to move on.
Step 5 - Choose which demographics to display on the layer
Demographics are only available when creating area layers.
The process of selecting demographics is simple but contains several options that warrant having their own article. Learn more about Choosing which demographics display on a layer.
When you're ready, click Continue.
Step 6 - Choose which classifications you want to use on the layer
You can now specify which classifications are available for this layer. If you don't want to use classifications with this area, just skip to the next step.
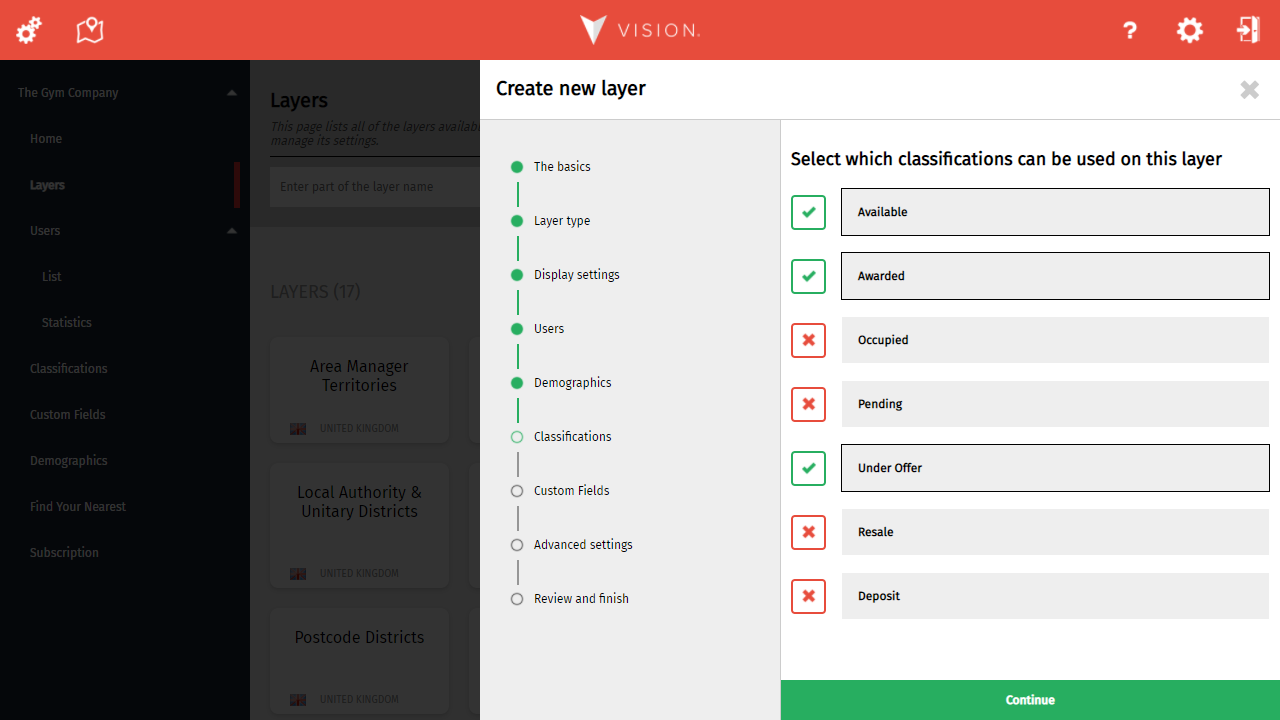
Selecting or deselecting a classification is as easy as clicking on it.
Click Continue to move on.
Step 7 - Choose which custom attributes you want to use on the layer
It's here that you can specify which of your custom attributes will be needed on this layer. If you don't want to use custom attributes at this time, simply skip to the next step.
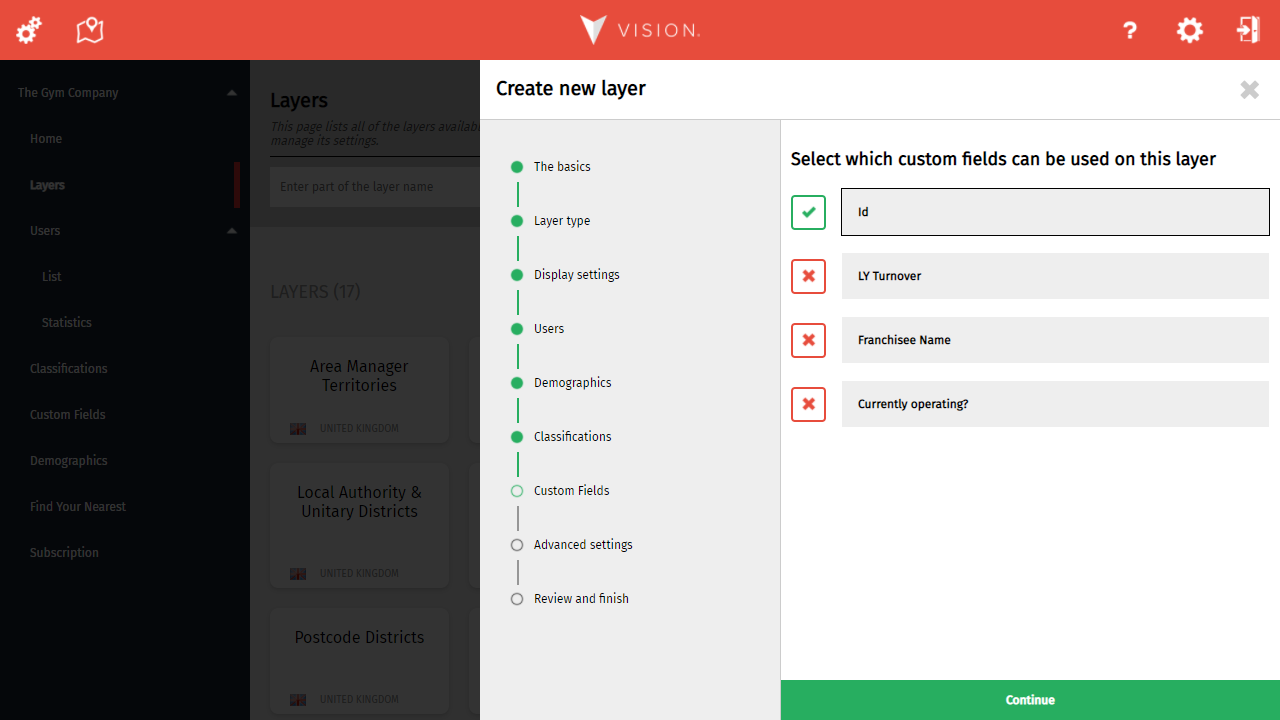
Selecting or deselecting a custom attribute is as easy as clicking on it.
Click Continue to move on.
Step 8 - Advanced layer settings
This is where you set any advanced settings for your layer. Most users will be able to accept the defaults and skip to the next step.

The settings on this page are for more advanced users.
Click Continue to move on.
Step 9 - Review and finish
The final stage simply confirms your choices through this process. If you've made a mistake, now is the time to go back and correct it.
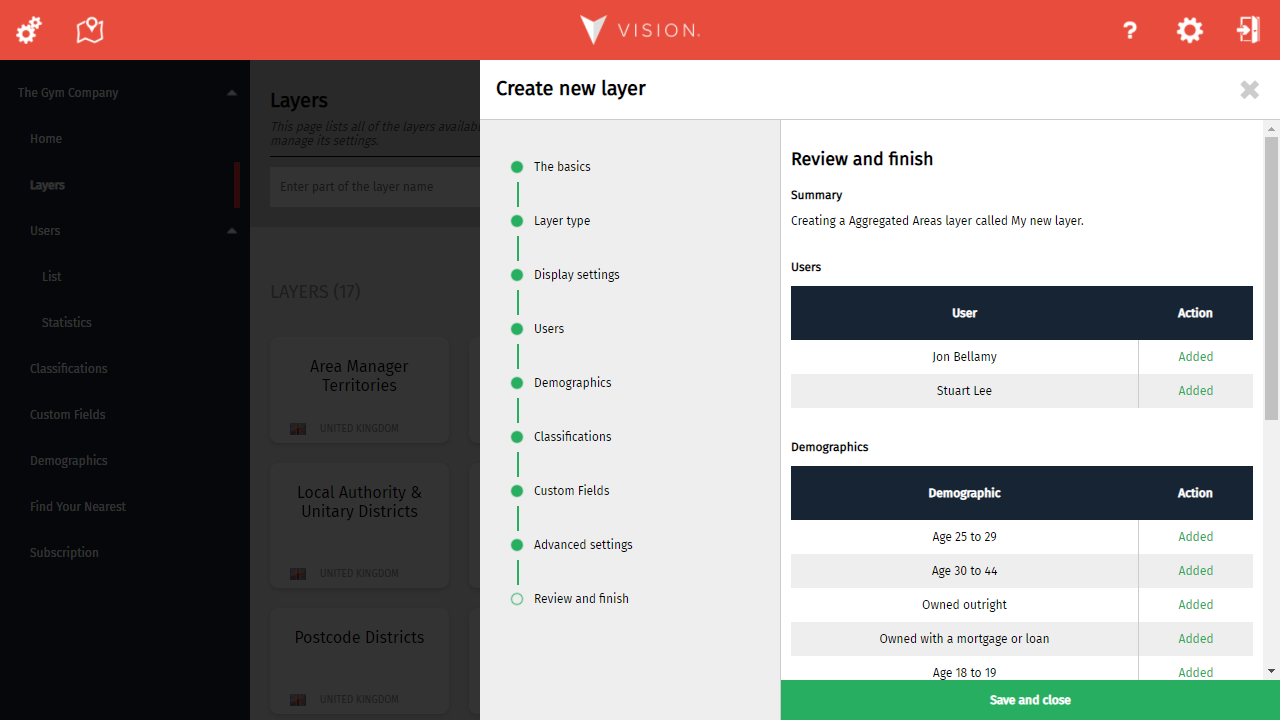
Most processes in Vision end with a confirmation of your changes, allowing you to correct any mistakes before saving.
Click Save and close to complete the process.